
Arduino nano tutorial & pinout
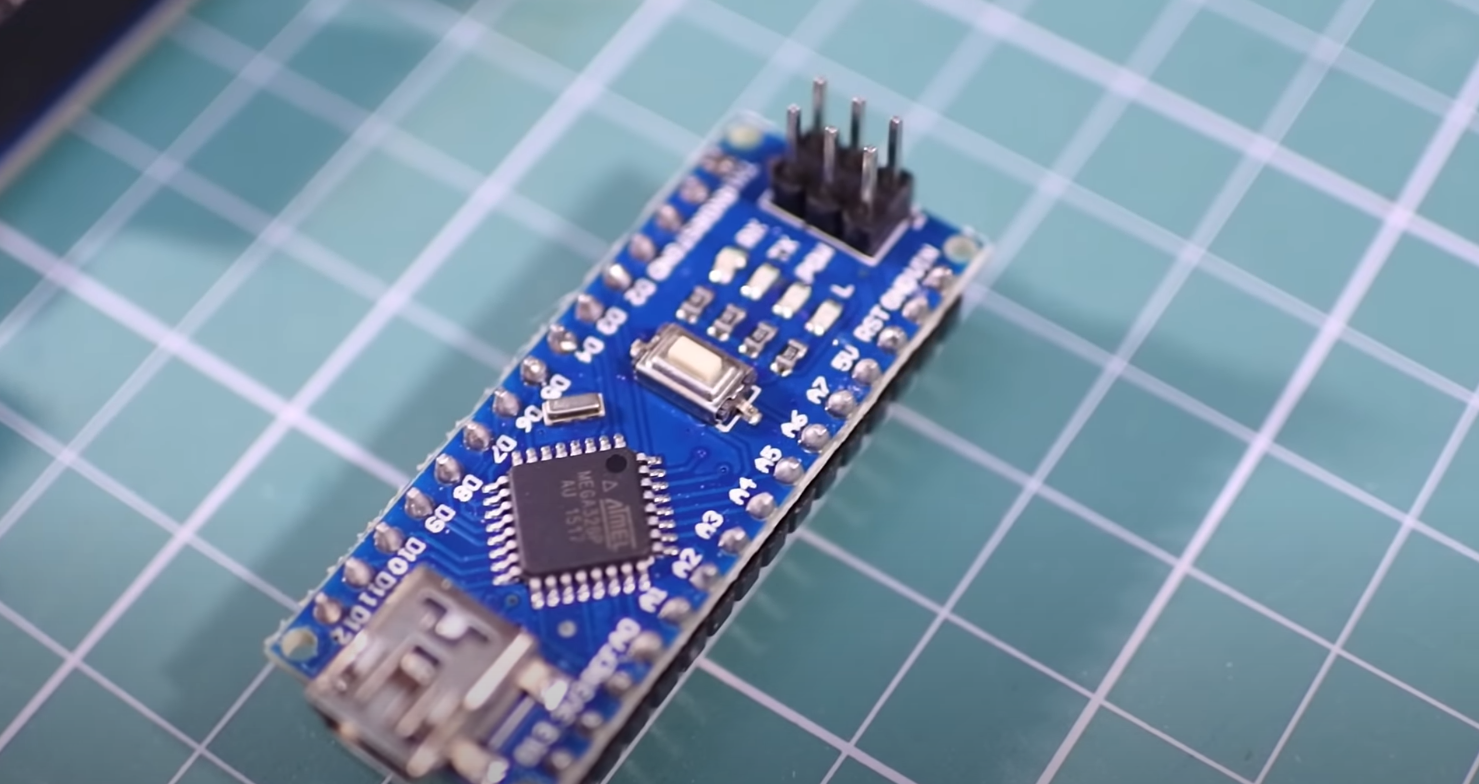
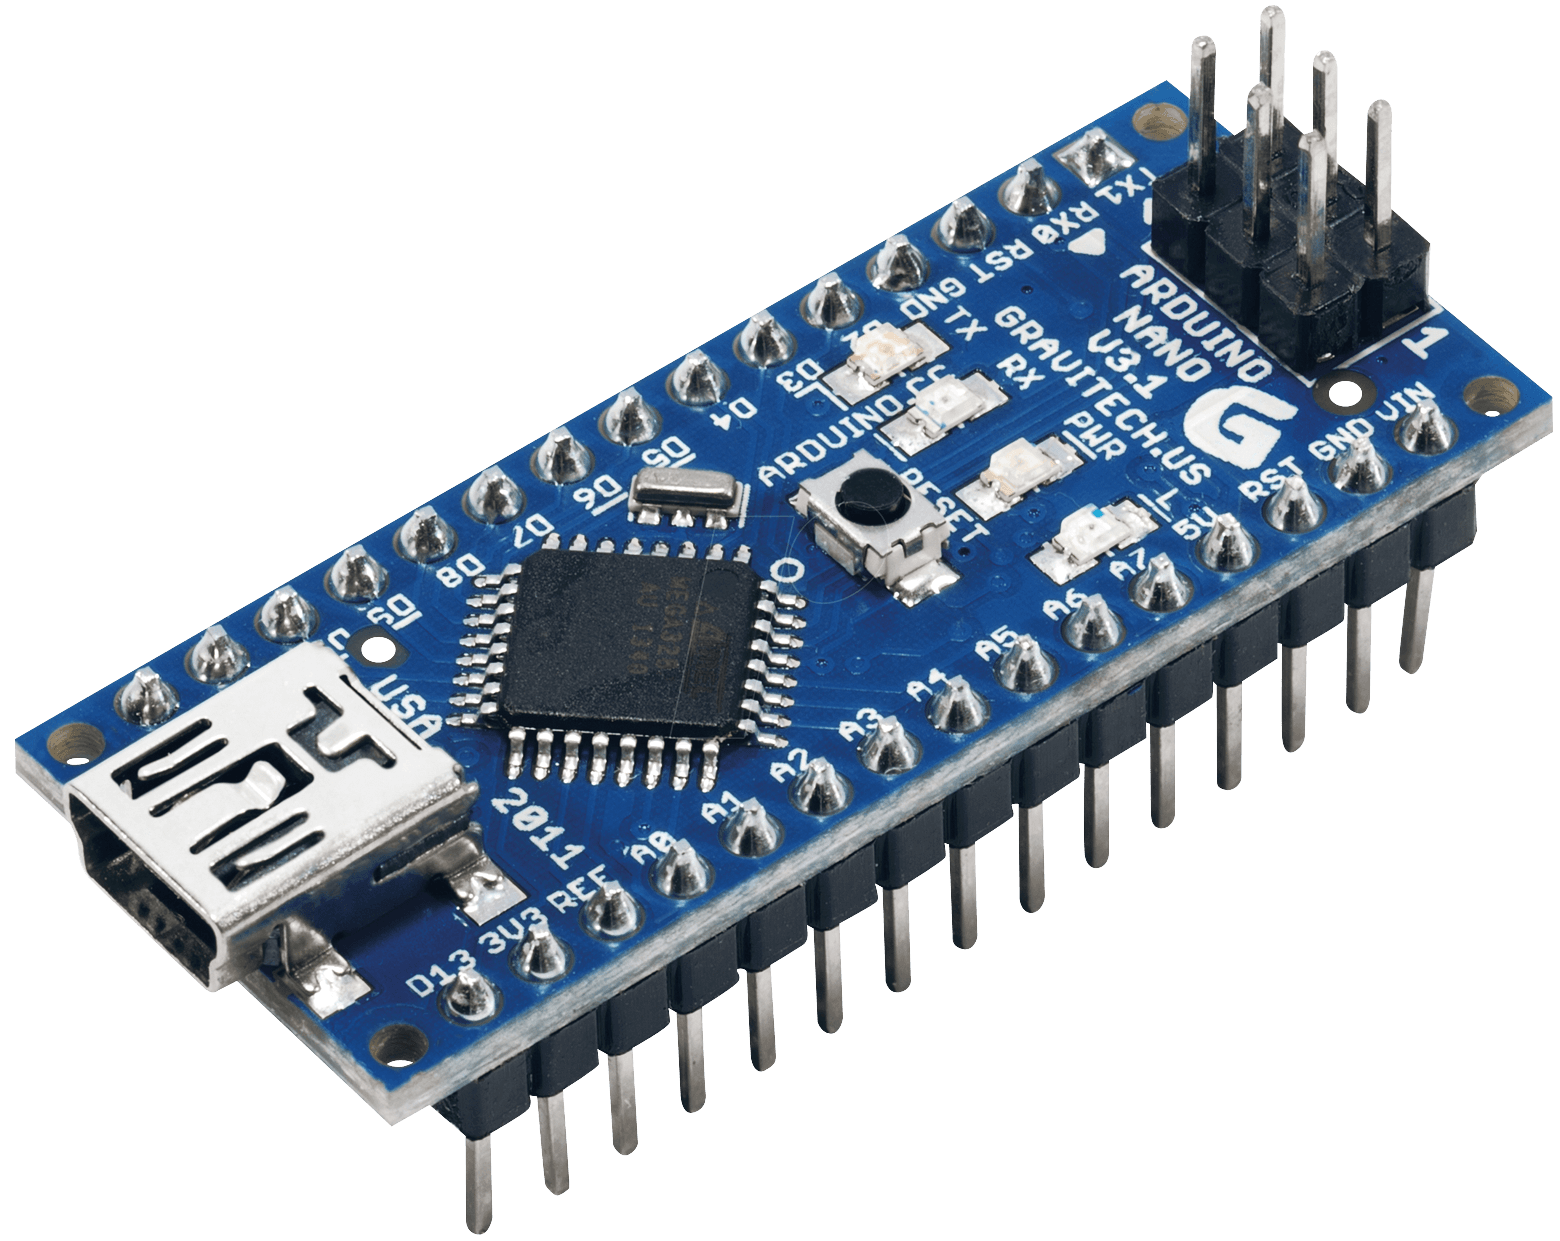
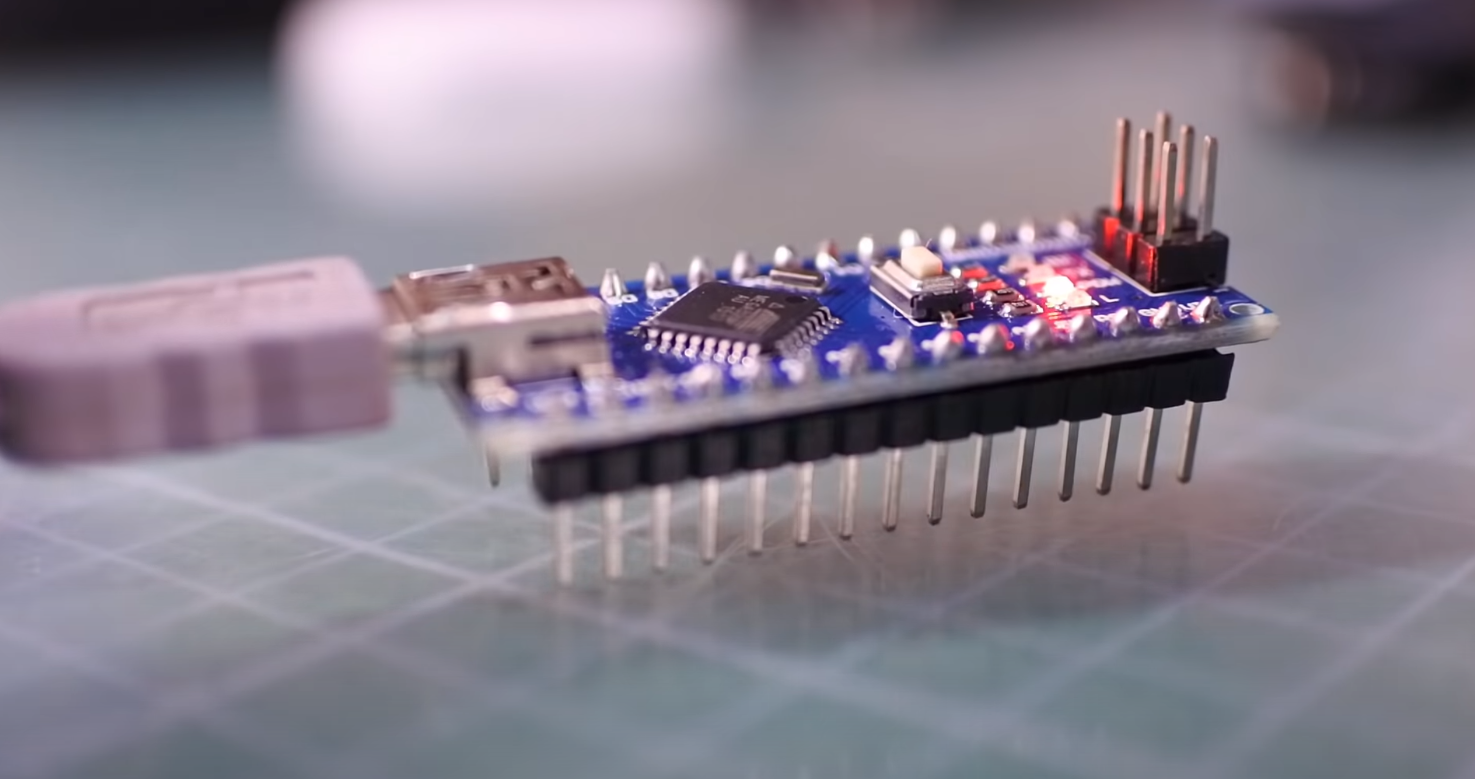
Arduino Nano is one of the avaible Arduino board models. Has a small size, complete feature, and easy to use. Have a size 1.70 Inch x 0.7 Inch, Arduino nano has a complete feature, such as: Atmel ATmega 328 IC, Restar button, 4 indikator LEDs, 3V3 Regulator, USB to Serial, Port I/O, etc.
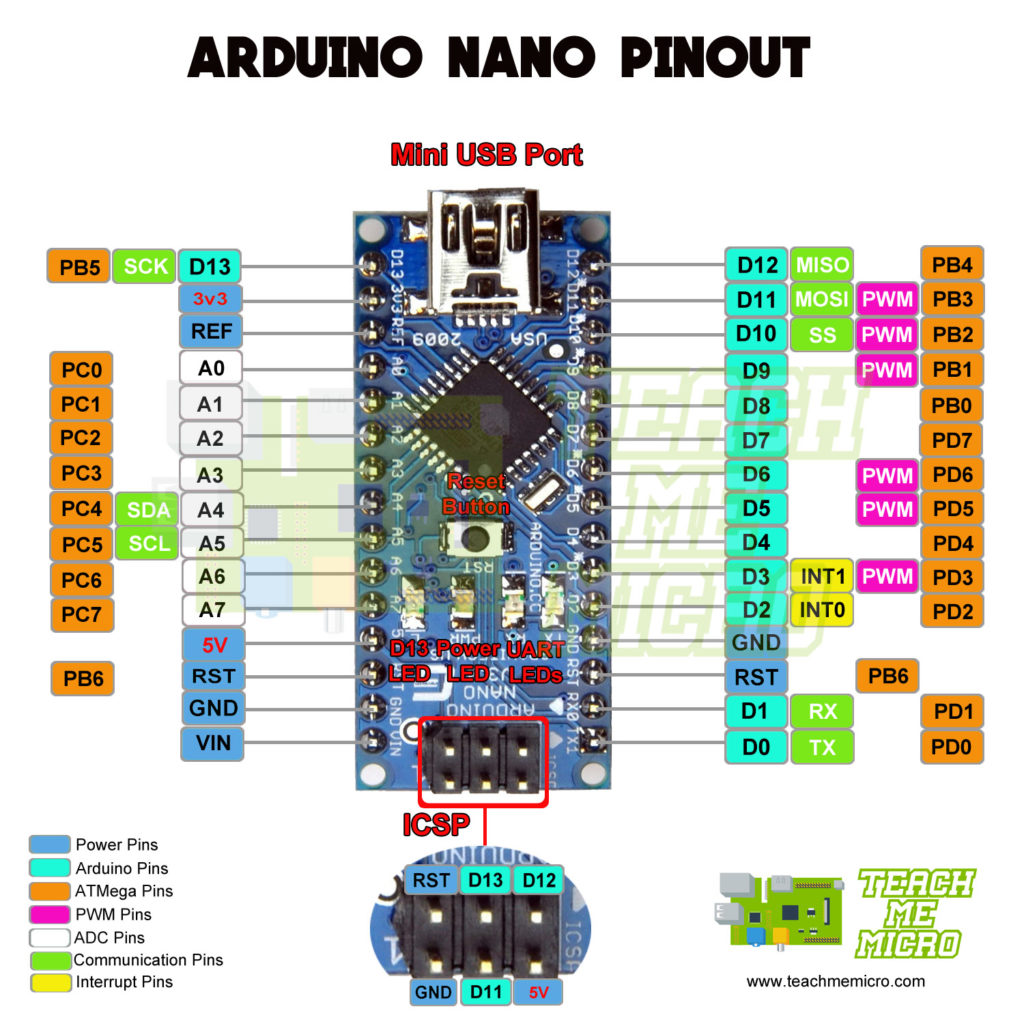
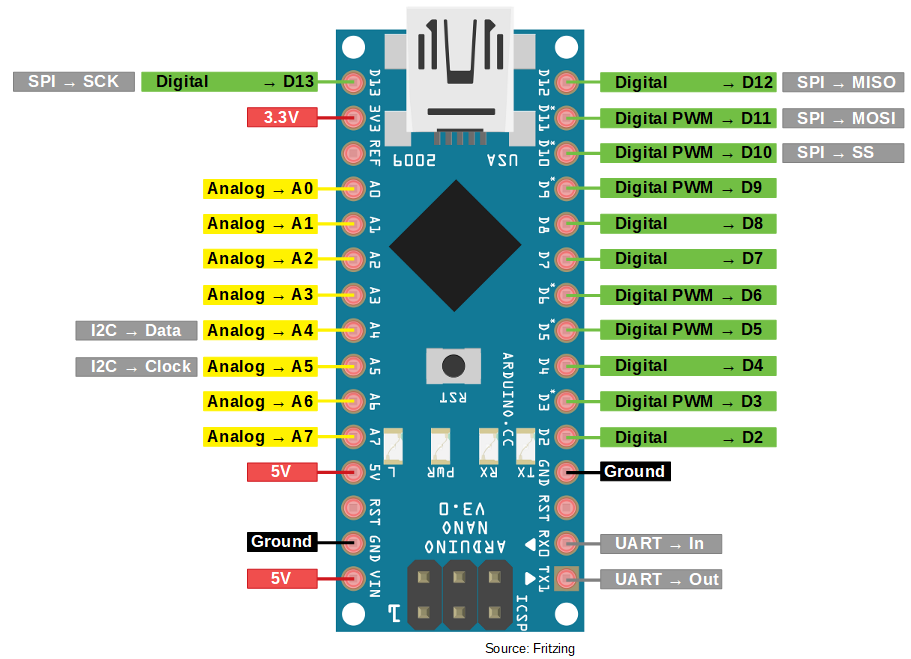
Arduino NANO Pinout Diagram Microcontroller Tutorials
Nano Hardware Design Guide Learn how to create your own custom hardware that is compatible with the Arduino Nano Family. Suggested Libraries Servo The Servo library allows an Arduino board to control RC (hobby) servo motors. Wire This library allows you to communicate with I2C / TWI devices. Arduino Basics Built-in Examples
How to program Arduino Nano Ultra Beginner Arduino Tutorial
0:00 / 5:44 • Introduction Introduction to Arduino Nano The Engineering Projects 13.3K subscribers Subscribe 716 Share 70K views 4 years ago Arduino Projects You can read more details about it.
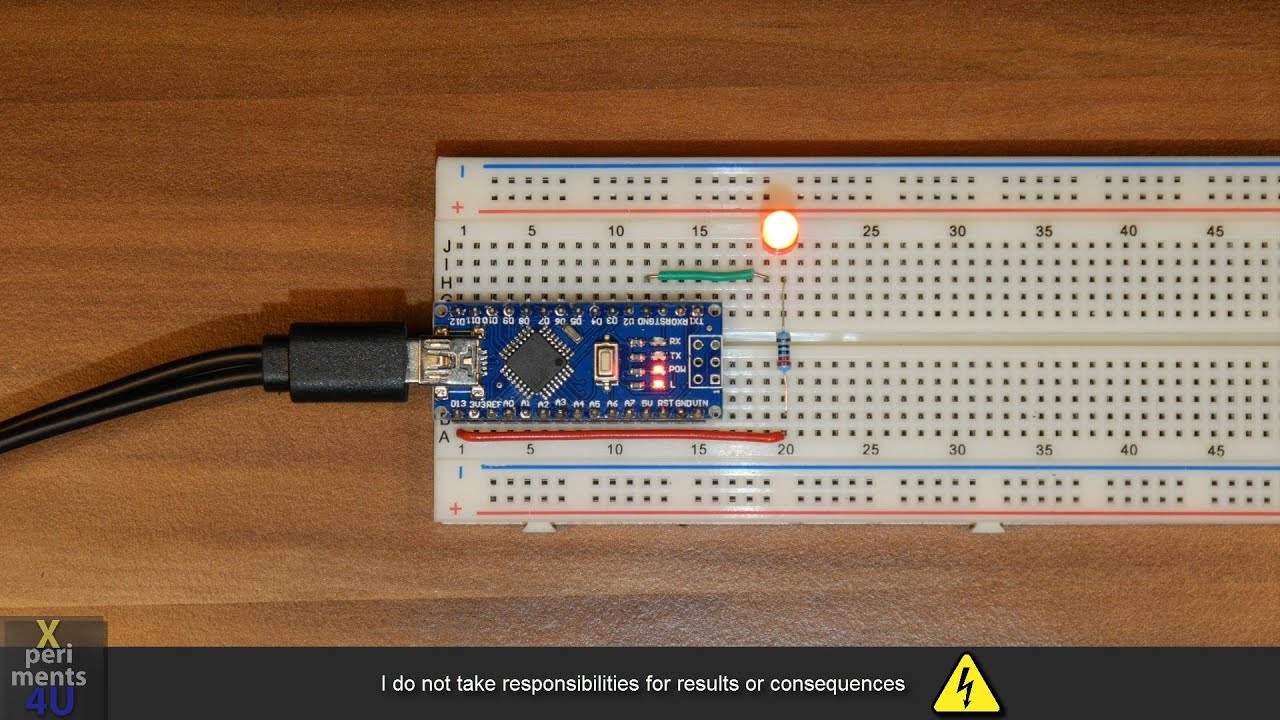
How to Power Arduino Nano Tutorial for Beginners NerdyTechy
In this tutorial we will control the built-in LED on four Arduino Nano Every boards, from a main Arduino Nano Every. To do so, we will connect the boards using a wired communication protocol called UART.
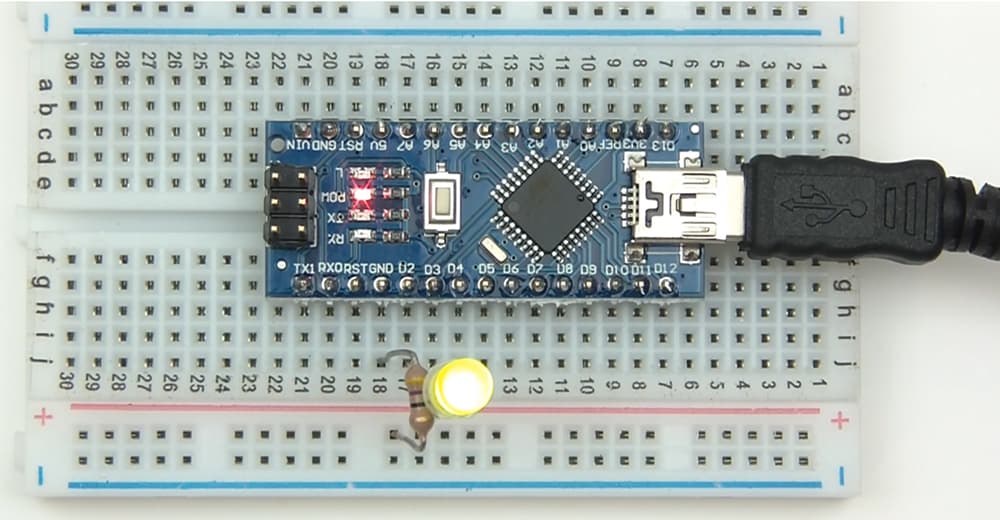
Arduino NANO Blink Blink (TUTORIAL) YouTube
The Nano Every is Arduino's smallest board with dimensions of only 45x18mm and a weight under 5 g. The small footprint and low price, make the Nano Every particularly suited for wearable inventions, low cost robotics and interactive projects requiring a small and easy-to-use microcontroller board.
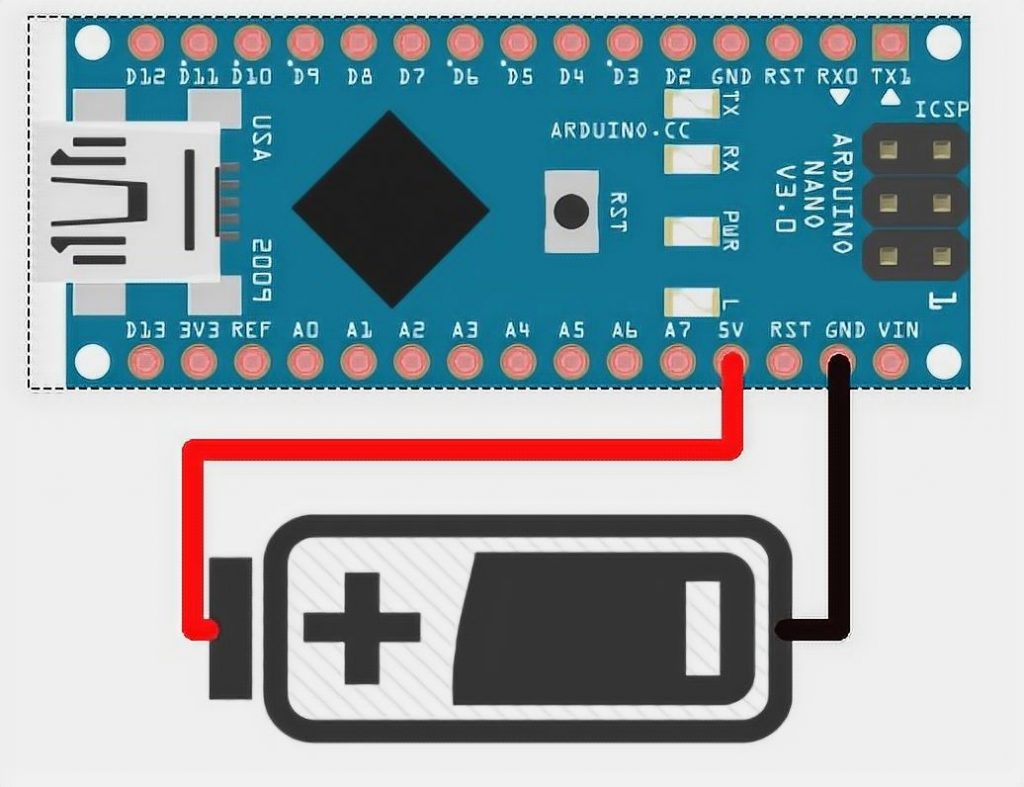
How to Power Arduino Nano Tutorial for Beginners NerdyTechy
Arduino Nano: In this tutorial we will learn how to install Arduino IDE and connect the Arduino Nano compatible micro-controller. To learn about what Arduino is, watch this quick video:
Make Your Own Arduino Nano In The Simplest Way (DIY Arduino Nano)
October 31, 2020 In this guide, learn about Arduino Nano pin outs and diagrams. We've created a well explained, diagram based pin out representation of Arduino Nano. Arduino Nano Pinout The Arduino Nano, as the name suggests is a compact, complete and bread-board friendly microcontroller board.

Arduino Nano Pinout Schematics Complete Tutorial With Pin Arduino Images
Arduino Project Hub is our official tutorial platform powered by hackster.io. Get inspired by a variety of tutorials, getting started guides, showcases and pro tips. Contribute projects and ideas, comment on the tutorials you are curious about, and 'Respect' the ones you like the most.
Arduino Nano Tutorial [Pinout] websiteforyou.su
To learn more about memory on an Arduino, visit the Arduino Memory Guide. Embedded Sensors. An IMU (Inertial Measurement Unit) on the Nano RP2040 Connect board. Many new Arduino boards come equipped with embedded sensors. For example, the Nano 33 BLE Sense has 7 embedded sensors, but is only 45x18mm (the size of a thumb). These are all.
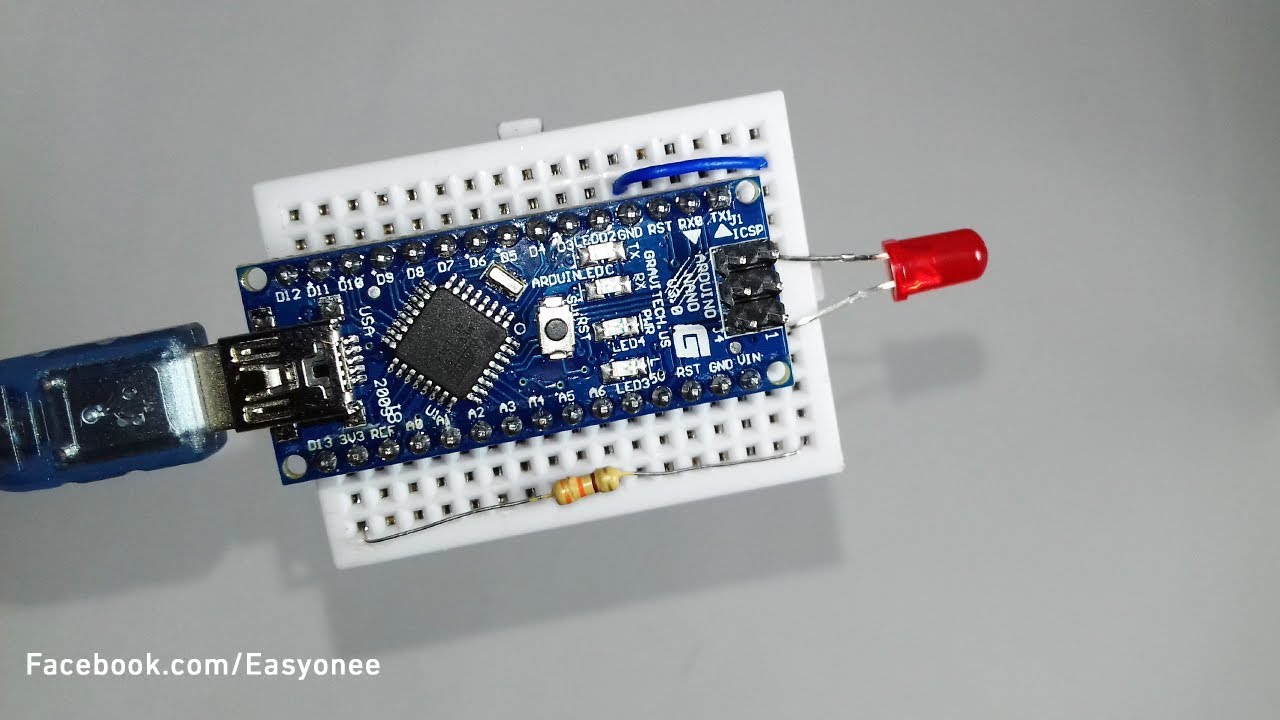
How to Blink LED with Arduino Nano Tutorial YouTube
aterial Item!Number ! Qty.! Ref. !Dest. ! on ! Mfg.!P/N ! MFG ! or !P/N ! or ! 1! 5! 9!, !F !V !10%! Ceramic! R! 5! U! Kemet! 80 "R! Mouser! 2! 3! 0!
How to Power Arduino Nano Tutorial for Beginners NerdyTechy
After you have successfully verified and uploaded the sketch to the two boards, make sure the writer board is connected, open the Serial Monitor. You will see a text asking for a value of 1 or 0 to be entered. When a value is entered it will be sent to the reader board. Nano tutorial I2C serial monitor. Sometimes errors occur, if the code is.
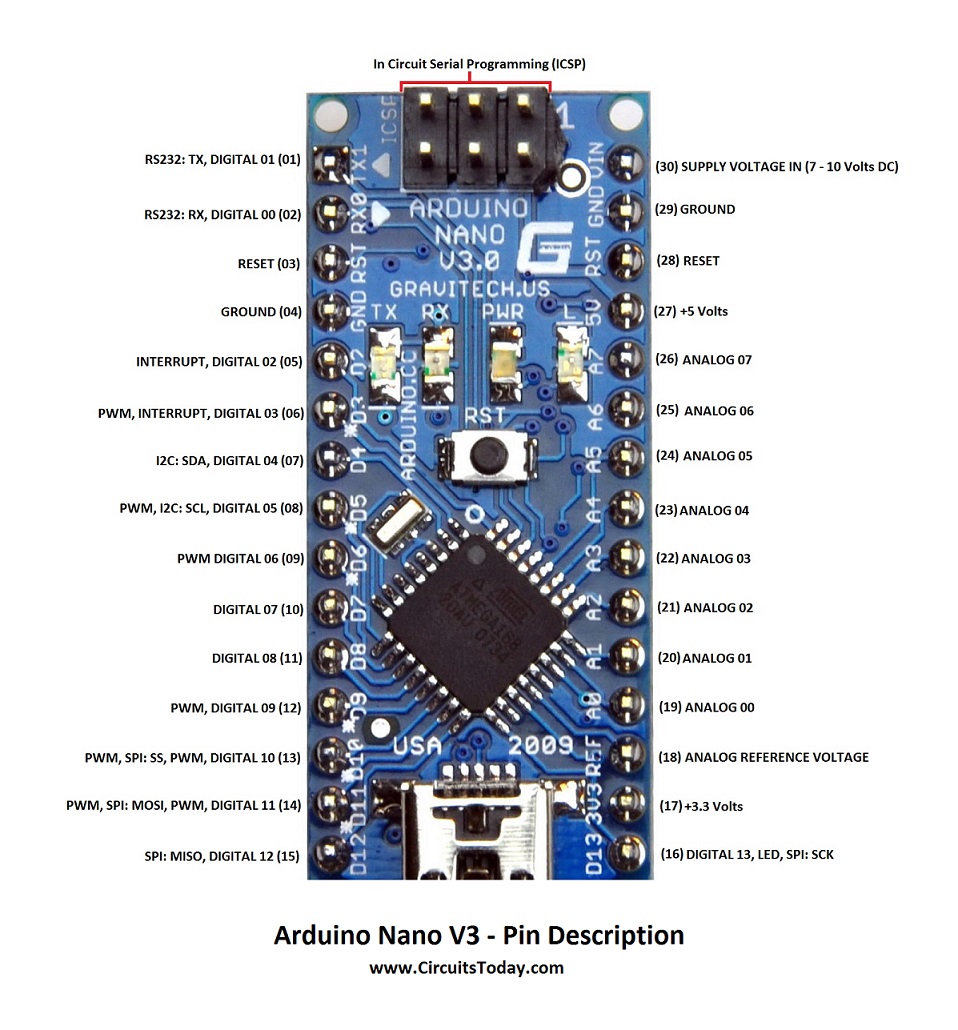
Arduino Nano Pinout & Schematics Complete tutorial with pin description
To install the board package, open the "Board Manager" from the menu to the left. Search for Nano ESP32 and install the latest version (or the version you want to use). Install Nano ESP32 boards package. You should now be able to select your board in the board selector. You will need to have your board connected to your computer via the USB-C.

How to use RFID WITH ARDUINO NANO RFID WITH ARDUINO NANO Tutorial step by step [Code & Circuit
1. Configuring the Receiver board. First, let's connect the Arduino Nano Every board to the computer and opening the Arduino Web Editor. This board will act as the receiver, which means that it will only receive data from the other board and turn ON or OFF the built-in LED according the received values. To start with the programming, start a.

Enhanced Spider Robot With Arduino Nano Arduino Tutorial
The Arduino Nano Every is programmed using the Arduino Software (IDE), our Integrated Development Environment common to all our boards and running both online and offline. For more information on how to get started with the Arduino Software visit the Getting Started page. Use your Arduino Nano Every on the Arduino Web IDE
Tutorial arduino nano YouTube
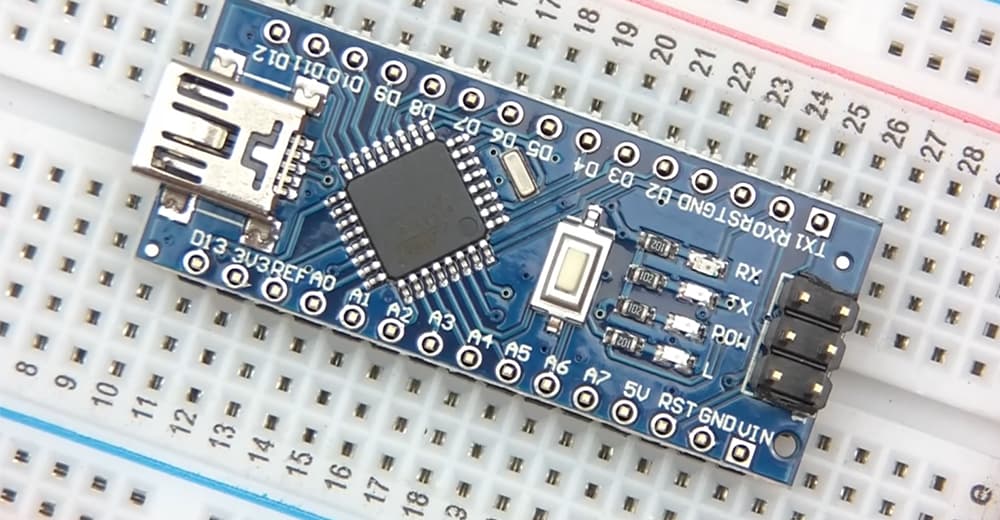
The Arduino Nano is a simple 8-bit microcontroller, ideal for beginners and simple embedded projects. It is programmed via USB and has a number of I/O pins. It uses the Atmel ATmega 328P microprocessor chip. Install the required device driver
How to program Arduino Nano Ultra Beginner Arduino Tutorial
Tutorials Now that you have set up and programmed your Arduino Nano board, you may find inspiration in our Project Hub tutorial platform. For more details on the Arduino Nano, see the hardware page. The text of the Arduino getting started guide is licensed under a Creative Commons Attribution-ShareAlike 3.0 License.